-
DEVICE INTEGRATION
- Palo Alto (Device Integration)
- Dell Cylance Endpoint
- McAfee Web Gateway
- Imperva WAF
- Darktrace
- Forescout CounterACT
- Juniper Cortex Threat
- Zscaler
- Sophos
- Sophos Endpoint
- Trend Micro
- Sophos Cyberoam Firewall
- Radware-WAF
- NetScaler WAF
- Ubuntu
- Juniper SRX
- Forcepoint Websense
- FireEye
- Forcepoint DLP
- F5 BIG-IP ASM
- CyberArk PIM
- CheckPoint
- Bluecoat Proxy
- Accops Hyworks
- Barracuda WAF Syslog
- Forwarding F5 Distributed Cloud Services Logs to DNIF over TLS
- JIRA CLOUD
- Aruba ClearPass
- Show Remaining Articles (13) Collapse Articles
-
CONNECTORS
-
- 1Password Connector
- Abnormal Security
- Akamai Netstorage
- Atlassian
- Auth0 Connector
- AWS CloudTrail
- AWS Kinesis
- AWS S3
- AWS S3 (Optimized)
- AWS S3 Optimized Cross Account Connector
- Azure Blob Storage Connector
- Azure Event Hub
- Azure NSG
- Beats
- Box
- Cisco Duo
- Cloudflare Logpull Connector Setup Guide
- CloudWatch Connector
- Cortex XDR
- CrowdStrike
- Cyble Vision
- Device42
- Dropbox Connector
- GCP
- GCP PUB/SUB
- GitHub
- Google Workspace
- Haltdos
- HTTP Connector
- Hub Spot Connector
- Indusface
- Jira Connector
- Microsoft Graph Security API
- Microsoft Intune
- Mimecast
- Netflow
- Netskope Connector
- Network Traffic Analysis
- NextDLP Reveal
- Office 365
- Okta
- OneLogin
- Orca
- PICO Legacy Connector
- Prisma Alerts
- Prisma Incidents
- Salesforce
- Salesforce Pub/Sub Connector
- Shopify Connector
- Slack
- Snowflake
- Snyk Connector
- Syslog
- TCP
- Tenable Vulnerability Management Connector
- TLS
- Trend Micro Audit Logs
- Workday HCM Connector
- Zendesk
- Zoom
- Jumpcloud Connector
- Sophos connector
- Tenable Security Center Connector
- AWS GuardDuty Connector
- Trend Micro Vision One Connector
- RediffMail Pro Connector
- Microsoft Sentinel
- Microsoft Exchange Online Connector
- Show Remaining Articles (53) Collapse Articles
-
-
DATA INGESTION
-
HUNTING WITH WORKBOOKS
-
- Your first FIND with the HYPERCLOUD
- Create a Search Block
- Create a Signal Block
- Create a Text Block
- Create an Outlier Block
- Create a DQL Block
- Create an SQL Block
- Create a Code Block
- Create a Visualisation Block
- Create a Call Block
- Create a Return Block
- Create a Notification Block
- Schedule a Workbook
- Native Workbook
- Workbook Functions
- How to view Workbooks?
- Add Parameters to Workbook
- Working with Pass through Content
- How to create a Workbook?
- Workbooks
- Show Remaining Articles (5) Collapse Articles
-
-
DNIF Query Language (DQL Language)
-
SECURITY MONITORING
- Streamline Alert Analysis with Signal Tagging
- Workbook Versioning: Track, Collaborate, and Restore with Ease
- What is Security Monitoring?
- Creating Signal Suppression Rules
- Why EBA
- Signal Suppression Rule
-
- What are signals?
- View Signal Context Details
- Suspect & Target
- Source Stream
- Signal Filters
- Signal Data export
- Signal Context Details
- Signal Confidence Levels
- Raise and View Signals
- Investigate Anywhere
- How to add a signal to a case?
- Graph View for Signals
- Global Signals
- False Positives
- Add Multiple Signals to a Case
- Add comment to the signal
- Show Remaining Articles (1) Collapse Articles
-
OPERATIONS
-
MANAGE DASHBOARDS
-
MANAGE REPORTS
-
USER MANAGEMENT & ACCESS CONTROL
-
BILLING
-
MANAGING YOUR COMPONENTS
-
GETTING STARTED
-
INSTALLATION
-
SOLUTION DESIGN
-
AUTOMATION
-
- Active Directory
- AlienVault
- Asset Store
- ClickSend
- Domain Tools
- Fortigate
- GreenSnow
- JiraServiceDesk
- Microsoft Teams Channel
- New Relic
- Opsgenie
- PagerDuty
- Palo Alto
- ServiceNow
- Slack Configuration
- TAXII
- Trend Micro
- URLhaus
- User Store
- Virustotal
- Webhook
- Show Remaining Articles (6) Collapse Articles
-
-
TROUBLESHOOTING AND DEBUGGING
-
- TLS ( Troubleshooting Procedure)
- TCP (Troubleshooting Procedure)
- Syslog (Troubleshooting Procedure)
- Salesforce ( Troubleshooting Procedure)
- PICO
- Office 365 (Troubleshooting Procedure)
- GSuite
- GCP (Troubleshooting Procedure)
- Beats (Troubleshooting Procedure)
- Azure NSG ( Troubleshooting Procedure)
- Azure Eventhub
- AWS S3 (Troubleshooting Procedure)
-
-
LICENSE MANAGEMENT
-
RELEASE NOTES
- March 16, 2026 - Application Update
- February 26, 2026 - Content Update
- January 19,2026 - Content Update
- December 23, 2025 - Application Update
- December 4,2025 - Content Update
- November 27, 2025 - Application Update
- October 28, 2025 - Content Update
- August 20, 2025 - Content Update
- August 5, 2025 - Application Update
- July 15, 2025 - Content Update
- June 13, 2025 - Content Update
- May 21, 2025 - Content Update
- April 17, 2025- Content Update
- March 25, 2025- Content Update
- March 18, 2025 - Application Update
- March 5, 2025 - Application Update
- January 27, 2025 - Application Update
- January 29, 2025 - Content update
- December 30, 2024 - Content Update
- December 12, 2024 - Content Update
- December 3, 2024 - Application Update
- November 15, 2024 - Content Update
- October 26, 2024- Application Update
- October 23, 2024 - Content Update
- October 16, 2024 - Application Update
- September 04, 2024 - Application Update
- September 04, 2024 - Content Update
- August 27, 2024 - Application Update
- July 30, 2024 - Application Update
- June 04, 2024- Application Update
- April 24, 2024- Application Update
- March 26, 2024 - Application Update
- February 19, 2024 - Application Update
- January 09, 2024 - Content Update
- January 09, 2024 - Application Update
- November 27, 2023 - Content Update
- November 27, 2023 - Application Update
- October 05, 2023 - Application Update (Release Notes v9.3.3)
- May 30, 2023 - Application Update (Release Notes v9.3.2)
- November 29, 2022 - Application Update (Release Notes v9.3.0)
- Show Remaining Articles (25) Collapse Articles
-
API
-
POLICIES
-
SECURITY BULLETINS
-
BEST PRACTICES
-
DNIF AI
-
DNIF LEGAL AND SECURITY COMPLIANCE
Collection Status
DNIF library has extractors ready to ingest data from all types of devices. It auto detects devices sending logs to DNIF and the extractors associated with them, this information is listed on the device management screen. It lists the devices that are sending logs to the console along with the IP addresses, extractors and streams associated for informational purposes. In addition, A provision has been made to manually add devices when it is required for the rare case where one needs to make a specific parser mapping for a particular device.
- Extractors are used to extract information from the incoming logs.
- Streams are the logical partitions into which different log types are distributed.
The following actions can be performed in the Collection Status page:
- View Collection Status
- Add or Edit Description for a source
- Manually override and rollback an extractor
- Delete an Inactive device
How to view Collection Status?
- Hover on the Administration icon on the left navigation bar of the Home screen and then click on Collection Status, to view all the devices sending logs to the console.


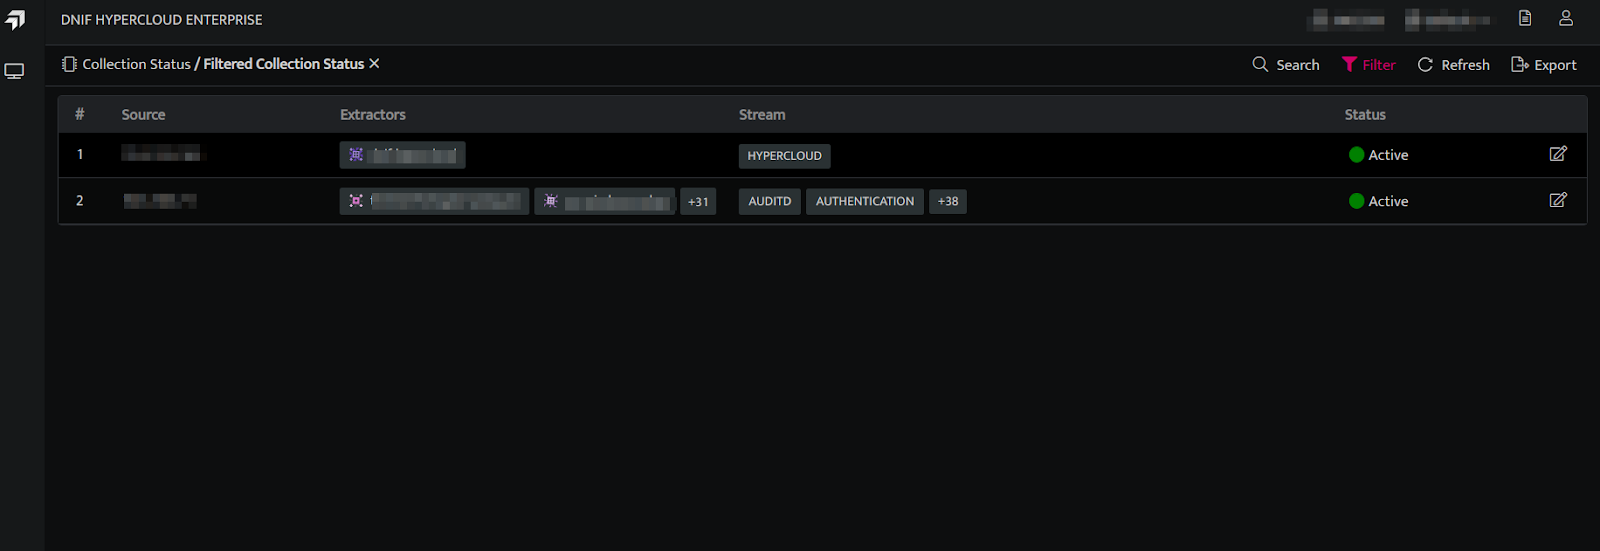
The Collection Status screen displays the following details:
| Field Name | Description |
| Source | Displays the IP Address/ name of the Connector sending logs to consoleNote: Hover on the details in this column and a copy icon will be displayed, you can copy the details of this column and use it for any further analysis as required. |
| Extractors | Display the extractors mapped to the device |
| Stream | Displays the stream category of the logs |
| Status | Displays the status of the device, active/inactive. You can apply the following filters:Active: Lists only the Active collection sourcesInactive: Lists only the Inactive collection sourcesAll: Lists all the active and inactive collection sources |
| Edit | You can override the auto detected extractors by manually adding an extractor from the drop down. The overridden extractors can also be rolled back to its original auto detected value. Refer below How to manually override and rollback an extractor? |
- Click Export, to download the collection status.
- Click Refresh icon on the right corner above the list to refresh the list. On successful update the following message will be displayed on screen.
Device List Fetched Successfully
Add or Edit description for a source
- Click on the following:
| Fields | Description |
| Edit | Click to add a description. |
| Save | Click to save the description. |

- Click on Save to add the description.

How to manually override and rollback an extractor?
To manually override an extractor:

- Click the Edit icon against the required device. The extractor column of the device will be changed into edit mode.

- Select the radio button to manually override the selected extractor.

- Select the required extractor from the dropdown and click Save. The Device will be updated with the new extractor as shown below

- This Pink icon in the above screen indicates that the extractor has been overridden
To rollback an overridden extractor
- Click the edit icon against the overridden device.
- Select the radio button, to rollback the extractor to the original auto detected value. The following screen is displayed

- Click Save. The Device will rollback to its original autodetected value as shown below

How to delete an inactive device?
Note: You must have the Tenant Admin role to delete an inactive device. Once you delete a device, you cannot recover it.
Steps to delete inactive devices
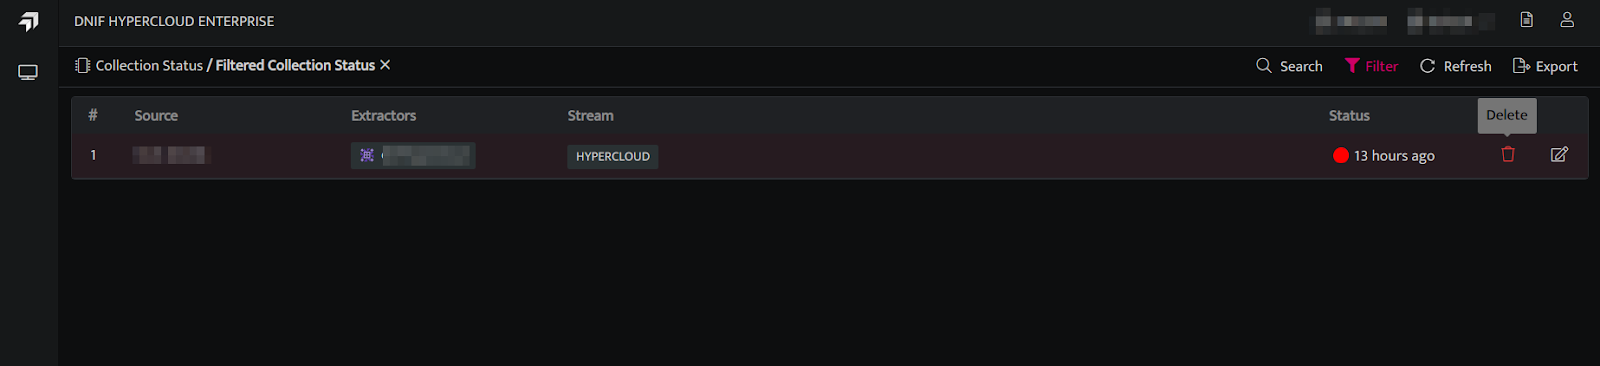
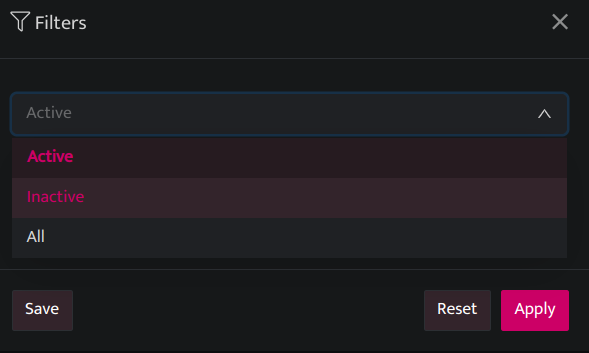
- To delete inactive devices, click on the Filters icon. By default, it will show all the active devices.
- Select status Inactive from the list in the dropdown menu and click Apply. The page will update to show all inactive devices.
| Field | Description |
| Active device | |
| Inactive device |

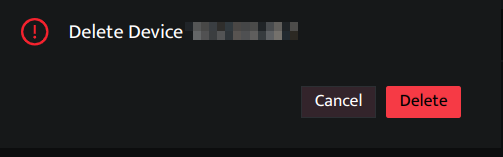
- Click the Delete icon next to the inactive device you want to delete.
- When the popup window appears, click Delete to confirm. Alternatively, click Cancel to close the popup without deleting the device.