
Hello. How can we help you?
-
DEVICE INTEGRATION
- Palo Alto (Device Integration)
- Dell Cylance Endpoint
- McAfee Web Gateway
- Imperva WAF
- Darktrace
- Forescout CounterACT
- Juniper Cortex Threat
- Zscaler
- Sophos
- Sophos Endpoint
- Trend Micro
- Sophos Cyberoam Firewall
- Radware-WAF
- NetScaler WAF
- Ubuntu
- Juniper SRX
- Forcepoint Websense
- FireEye
- Forcepoint DLP
- F5 BIG-IP ASM
- CyberArk PIM
- CheckPoint
- Bluecoat Proxy
- Accops Hyworks
- Barracuda WAF Syslog
- Forwarding F5 Distributed Cloud Services Logs to DNIF over TLS
- JIRA CLOUD
- Aruba ClearPass
- Show Remaining Articles (13) Collapse Articles
-
CONNECTORS
-
- 1Password Connector
- Abnormal Security
- Akamai Netstorage
- Atlassian
- Auth0 Connector
- AWS CloudTrail
- AWS Kinesis
- AWS S3
- AWS S3 (Optimized)
- AWS S3 Optimized Cross Account Connector
- Azure Blob Storage Connector
- Azure Event Hub
- Azure NSG
- Beats
- Box
- Cisco Duo
- Cloudflare Logpull Connector Setup Guide
- CloudWatch Connector
- Cortex XDR
- CrowdStrike
- Cyble Vision
- Device42
- Dropbox Connector
- GCP
- GCP PUB/SUB
- GitHub
- Google Workspace
- Haltdos
- HTTP Connector
- Hub Spot Connector
- Indusface
- Jira Connector
- Microsoft Graph Security API
- Microsoft Intune
- Mimecast
- Netflow
- Netskope Connector
- Network Traffic Analysis
- NextDLP Reveal
- Office 365
- Okta
- OneLogin
- Orca
- PICO Legacy Connector
- Prisma Alerts
- Prisma Incidents
- Salesforce
- Salesforce Pub/Sub Connector
- Shopify Connector
- Slack
- Snowflake
- Snyk Connector
- Syslog
- TCP
- Tenable Vulnerability Management Connector
- TLS
- Trend Micro Audit Logs
- Workday HCM Connector
- Zendesk
- Zoom
- Jumpcloud Connector
- Sophos connector
- Tenable Security Center Connector
- AWS GuardDuty Connector
- Trend Micro Vision One Connector
- RediffMail Pro Connector
- Microsoft Sentinel
- Microsoft Exchange Online Connector
- Show Remaining Articles (53) Collapse Articles
-
-
DATA INGESTION
-
HUNTING WITH WORKBOOKS
-
- Your first FIND with the HYPERCLOUD
- Create a Search Block
- Create a Signal Block
- Create a Text Block
- Create an Outlier Block
- Create a DQL Block
- Create an SQL Block
- Create a Code Block
- Create a Visualisation Block
- Create a Call Block
- Create a Return Block
- Create a Notification Block
- Schedule a Workbook
- Native Workbook
- Workbook Functions
- How to view Workbooks?
- Add Parameters to Workbook
- Working with Pass through Content
- How to create a Workbook?
- Workbooks
- Show Remaining Articles (5) Collapse Articles
-
-
DNIF Query Language (DQL Language)
-
SECURITY MONITORING
- Streamline Alert Analysis with Signal Tagging
- Workbook Versioning: Track, Collaborate, and Restore with Ease
- What is Security Monitoring?
- Creating Signal Suppression Rules
- Why EBA
- Signal Suppression Rule
-
- What are signals?
- View Signal Context Details
- Suspect & Target
- Source Stream
- Signal Filters
- Signal Data export
- Signal Context Details
- Signal Confidence Levels
- Raise and View Signals
- Investigate Anywhere
- How to add a signal to a case?
- Graph View for Signals
- Global Signals
- False Positives
- Add Multiple Signals to a Case
- Add comment to the signal
- Show Remaining Articles (1) Collapse Articles
-
OPERATIONS
-
MANAGE DASHBOARDS
-
MANAGE REPORTS
-
USER MANAGEMENT & ACCESS CONTROL
-
BILLING
-
MANAGING YOUR COMPONENTS
-
GETTING STARTED
-
INSTALLATION
-
SOLUTION DESIGN
-
AUTOMATION
-
- Active Directory
- AlienVault
- Asset Store
- ClickSend
- Domain Tools
- Fortigate
- GreenSnow
- JiraServiceDesk
- Microsoft Teams Channel
- New Relic
- Opsgenie
- PagerDuty
- Palo Alto
- ServiceNow
- Slack Configuration
- TAXII
- Trend Micro
- URLhaus
- User Store
- Virustotal
- Webhook
- Show Remaining Articles (6) Collapse Articles
-
-
TROUBLESHOOTING AND DEBUGGING
-
- TLS ( Troubleshooting Procedure)
- TCP (Troubleshooting Procedure)
- Syslog (Troubleshooting Procedure)
- Salesforce ( Troubleshooting Procedure)
- PICO
- Office 365 (Troubleshooting Procedure)
- GSuite
- GCP (Troubleshooting Procedure)
- Beats (Troubleshooting Procedure)
- Azure NSG ( Troubleshooting Procedure)
- Azure Eventhub
- AWS S3 (Troubleshooting Procedure)
-
-
LICENSE MANAGEMENT
-
RELEASE NOTES
- March 16, 2026 - Application Update
- February 26, 2026 - Content Update
- January 19,2026 - Content Update
- December 23, 2025 - Application Update
- December 4,2025 - Content Update
- November 27, 2025 - Application Update
- October 28, 2025 - Content Update
- August 20, 2025 - Content Update
- August 5, 2025 - Application Update
- July 15, 2025 - Content Update
- June 13, 2025 - Content Update
- May 21, 2025 - Content Update
- April 17, 2025- Content Update
- March 25, 2025- Content Update
- March 18, 2025 - Application Update
- March 5, 2025 - Application Update
- January 27, 2025 - Application Update
- January 29, 2025 - Content update
- December 30, 2024 - Content Update
- December 12, 2024 - Content Update
- December 3, 2024 - Application Update
- November 15, 2024 - Content Update
- October 26, 2024- Application Update
- October 23, 2024 - Content Update
- October 16, 2024 - Application Update
- September 04, 2024 - Application Update
- September 04, 2024 - Content Update
- August 27, 2024 - Application Update
- July 30, 2024 - Application Update
- June 04, 2024- Application Update
- April 24, 2024- Application Update
- March 26, 2024 - Application Update
- February 19, 2024 - Application Update
- January 09, 2024 - Content Update
- January 09, 2024 - Application Update
- November 27, 2023 - Content Update
- November 27, 2023 - Application Update
- October 05, 2023 - Application Update (Release Notes v9.3.3)
- May 30, 2023 - Application Update (Release Notes v9.3.2)
- November 29, 2022 - Application Update (Release Notes v9.3.0)
- Show Remaining Articles (25) Collapse Articles
-
API
-
POLICIES
-
SECURITY BULLETINS
-
BEST PRACTICES
-
DNIF AI
-
DNIF LEGAL AND SECURITY COMPLIANCE
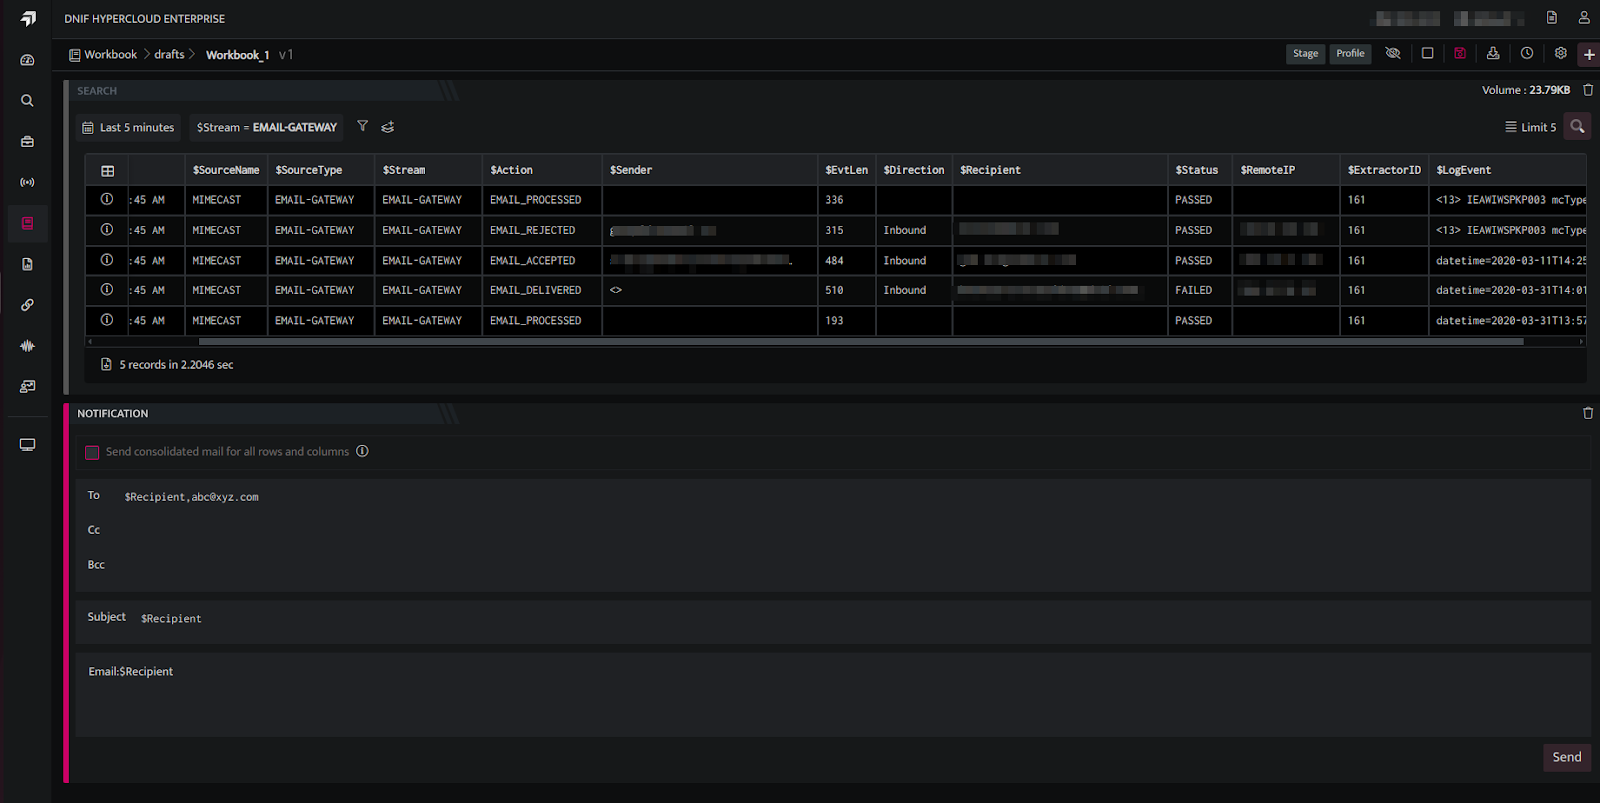
Create a Notification Block
Notification blocks allow you to send notifications to users via email, incorporating data received from the previous block into the notification.
The Notification block can send data as a consolidated email or as individual emails for each row in the data result set.
How to create a Notification Block?
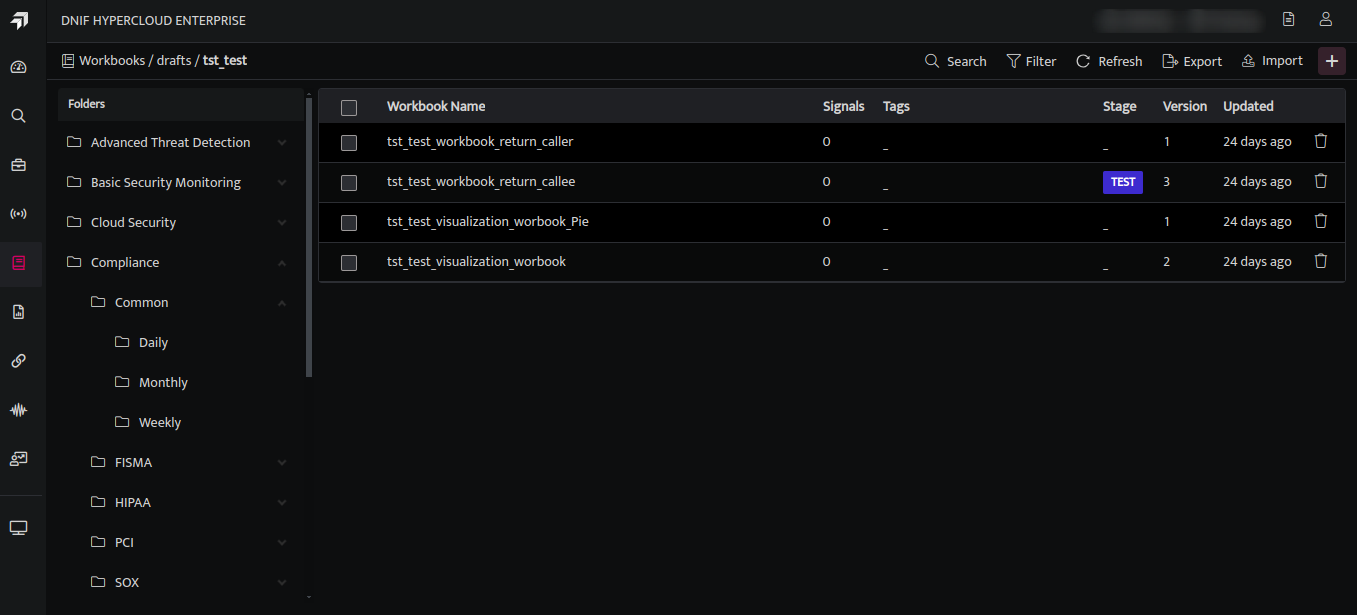
- Hover on the Workbook icon on the left navigation bar, it will display the folder-wise view of the existing workbook in the tenant (previously known as cluster).
- To create a new workbook, click the plus icon at the top right corner of the Workbook list page or click the find icon on the navigation bar.
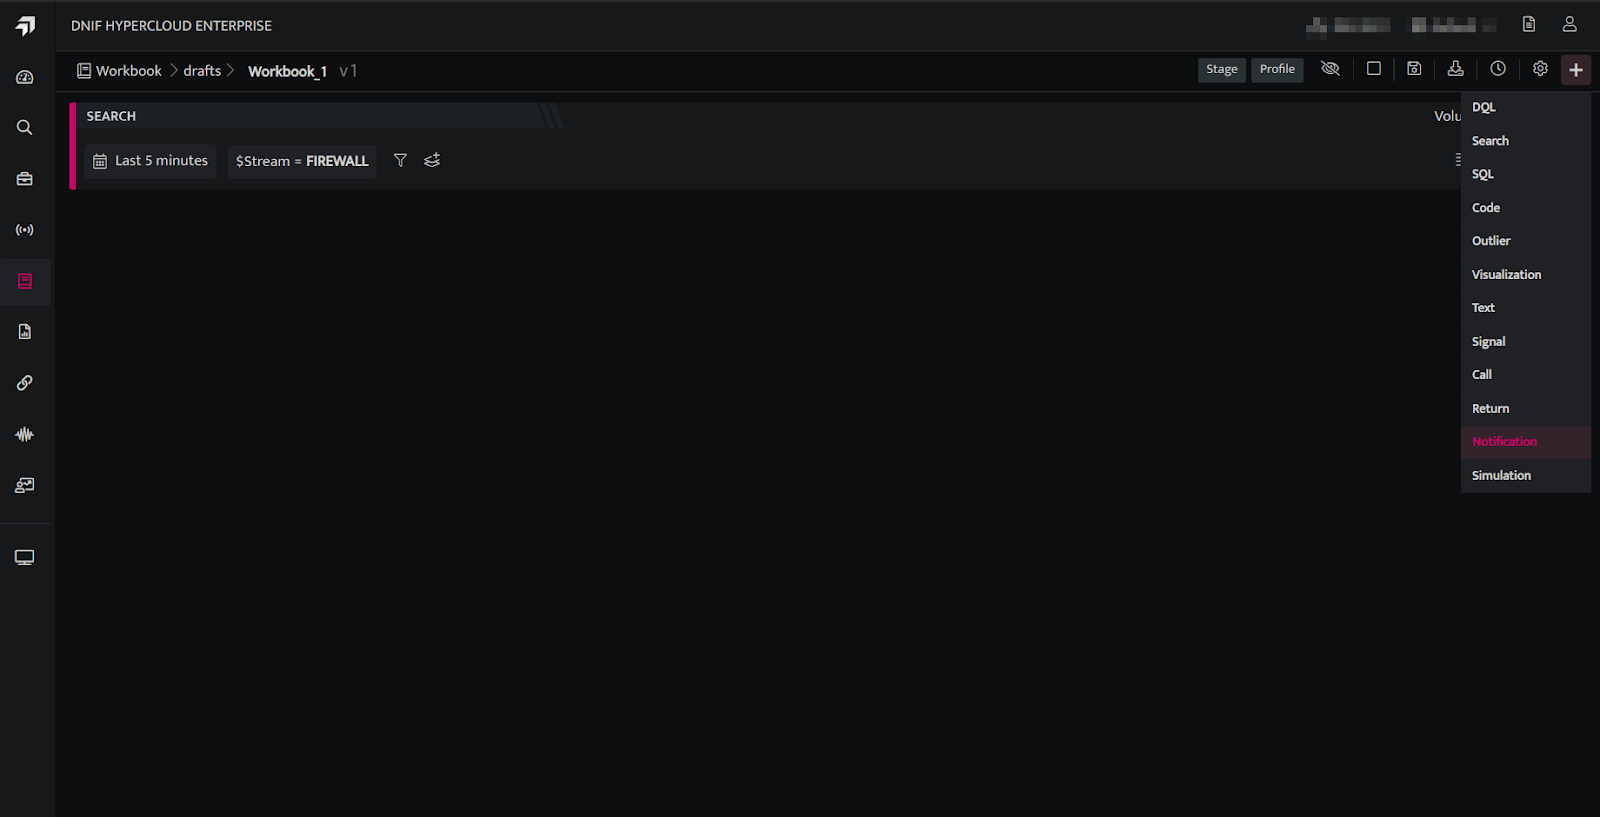
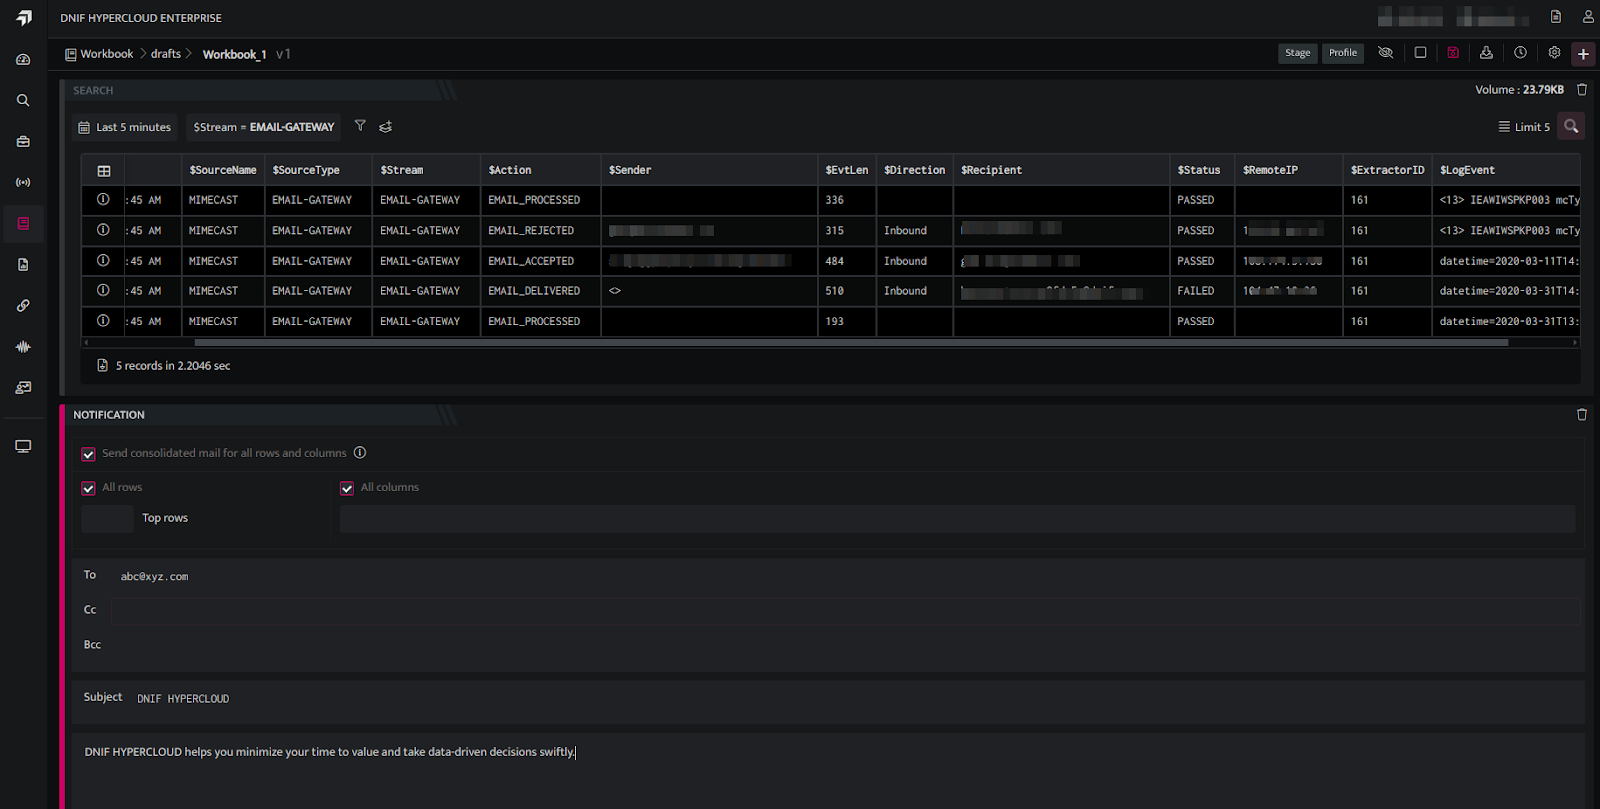
- Click the plus icon on the workbook page and select Notification Block from the list, the following screen will be displayed
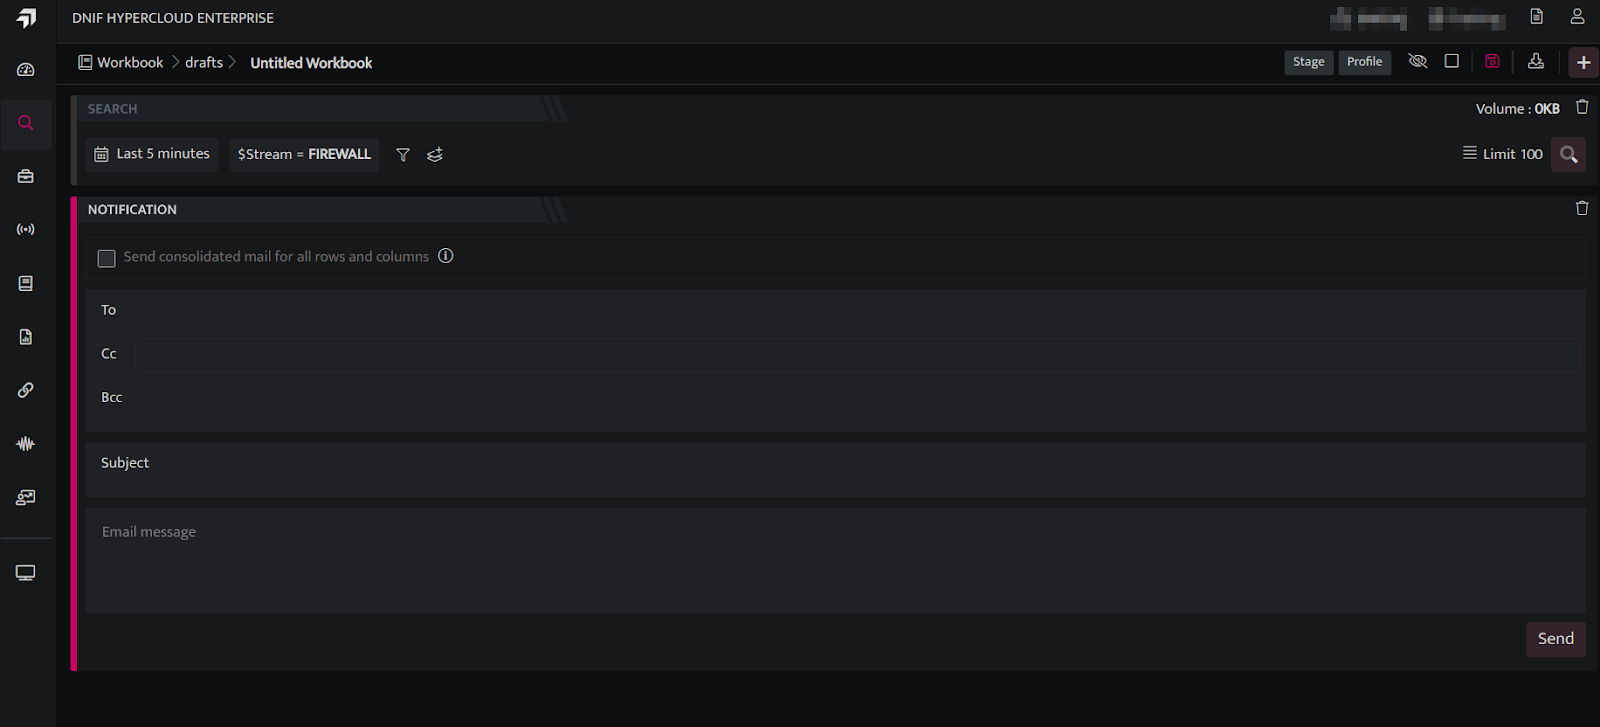
1. Notification in a consolidated email
- To send a consolidated email, select the checkbox Send consolidated mail for all rows and columns.
- You can choose to send all rows or limit it to the Top N rows.
- You can choose to send all columns or selected columns.
- The selected result set is sent as an attachment in a single email.
- This option is ideal for bulk reporting.
- When using this option, the notification block supports only absolute email addresses as recipients.
| Field | Description |
| Send consolidated mail for all rows and columns | Check this to send a consolidated email |
| All rows | Check this to send all rows |
| All columns | Check this to send all columns |
| Top rows | This is enabled only when the checkbox All rows is unchecked. Enter the number of top rows you want to send. |
| Columns | This is enabled only when the checkbox All columns is unchecked. Select the columns you want to send. |
| To | Specify the main recipients of the email. This field accepts only absolute email addresses. E.g. abc@xyz.com |
| Cc | Specify any secondary recipients who should be included in the email. This field accepts only absolute email addresses. E.g. abc@xyz.com |
| Bcc | Specify any bcc recipients. This field accepts only absolute email addresses. E.g. abc@xyz.com |
| Subject | A title of the email’s content. |
| Message | Email Message |
Example 1 – Sending All rows and All columns
Example 2 – Sending a specified number of rows and chosen columns.

2. Notification in individual emails for each row of the resultset
- To send an individual email, uncheck the Send consolidated mail for all rows and columns.
- This option is best suited for scenarios where each event requires immediate and focused attention.
- When using this option, the notification block supports both absolute email addresses and email address fields from the result set as recipients.
| Field | Description |
| To | Specify the main recipients of the email. This field accepts both absolute email addresses. E.g. abc@xyz.com and email address fields from the resultset. E.g . $Email |
| Cc | Specify any secondary recipients who should be included in the email. This field accepts both absolute email addresses. E.g. abc@xyz.com and email address fields from the resultset. E.g . $Email |
| Bcc | Specify any bcc recipients. This field accepts both absolute email addresses. E.g. abc@xyz.com and email address fields from the resultset. E.g . $Email |
| Subject | A title of the email’s content. This may also contain fields from the resultset. E.g. DNIF Signal raised: $SignalId |
| Message | Email Message. This may also contain fields from the resultset. |
Note: The Notification Blocks can also be reused across workbooks using the call block functionality.