The Office 365 Management Activity API provides information about various user, admin, system, and policy actions and events from Office 365 and Azure Active Directory activity logs. Microsoft Office 365 connector uses the pull method by subscribing to the Office 365 Management Activity API content types.
Prerequisites
- Office 365 management API credentials
- Tenant id
- Client key
- Secret key
- Tenant domain
- How to find Tenant Id?
- Login to the Azure Management Portal with the credentials of the tenant, subscribed to Microsoft Office 365.
- In the navigation menu, select Azure Active Directory.
- In Manage, select Properties.
- Copy the Tenant Id, Use this value for the Tenant Id.
- How to find Tenant Domain?
- Log in to your Office 365 Admin Center as an Administrator.
- Click Show All
- Got to Settings click Domains (or click here).
- Find a domain that ends with .onmicrosoft.com. This is your Office 365 tenant name.
- Register your application in Azure AD
- Login to the Azure Management Portal with the credentials of the tenant that is subscribed to Microsoft Office 365.
- In the navigation menu, select Azure Active Directory.
- In the Manage section, select App Registration and click New Registration.
- Enter the Display Name for the application.
- In the Supported account types section, select the type of account to use the application or to access the API.
- Click Register.
- Copy and store the Application (client) ID value. Use this value for the Client Key.
- Generate a Client secret for the application
- Navigate to the Application you registered in Step 4
- From the Manage pane, select Certificates & secrets > Add New client secret.
- Enter a Description and select Expiry Date for the Client Secret and click Add.
- Copy and store your client secret key value because it can't be retrieved later.
- Specify the permissions to access Microsoft Office 365 Management APIs.
- Navigate to the Application you registered in Step 4.
- Click API Permissions > Add a permission > choose Office 365 Management APIs > Delegated permissions, and then select the following options and click Add permissions.
- Activity Feed
- ActivityFeed.Read
- ActivityFeed.ReadDlp
- ServiceHealth
- ServiceHealth.Read
- Activity Feed
- Click Application permissions, and then select the following options and click Add permissions.
- * Activity Feed
- ActivityFeed.Read
- ActivityFeed.ReadDlp
- ServiceHealth
- ServiceHealth.Read
- * Activity Feed
- In the API permissions window, click *Grant admin consent for dnifhq
- Click Yes to confirm.
- Use the compliance center to turn on audit log search:
- Go to the compliance center and sign in (https://protection.office.com/homepage).
- In the compliance center, go to Search > Audit log search.
- Click Turn on auditing.
- Create a subscription in Azure Portal
- Sign in to the Azure portal.
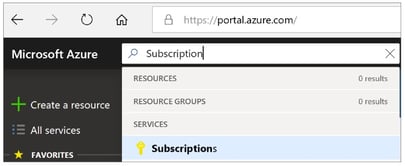
- Search for Subscriptions.
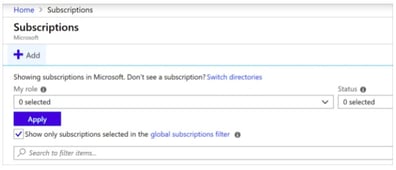
- Select Add.
- If you have access to multiple billing accounts, select the billing account for which you want to create the subscription.
- Fill the form and click Create. The tables below list the fields on the form for each type of billing account.
- Check your subscriptions
- Visit this Microsoft Office website, click on the Sign-in button, and sign-in using the email address that you used to purchase your Office 365 subscription.
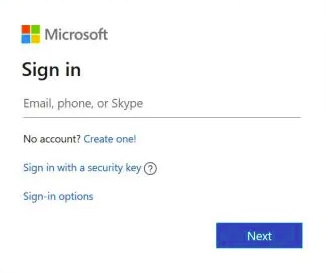
- Once you sign in to your Office account, you will see the following page
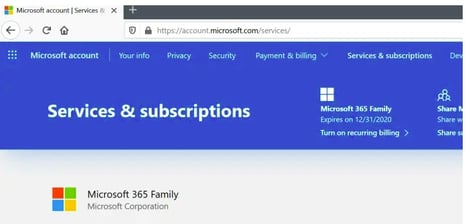
- The page displays the details of your Microsoft Office 365 subscription.
- Visit this Microsoft Office website, click on the Sign-in button, and sign-in using the email address that you used to purchase your Office 365 subscription.
Configuration
The following are the configurations to forward Office 365 Connector logs to DNIF.
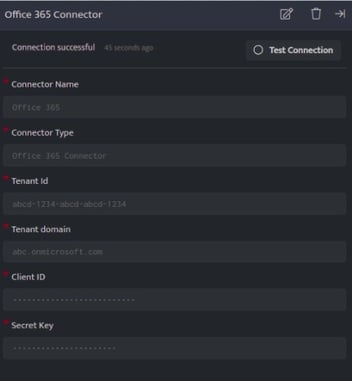
| Field | Description |
| Connector Name | Enter a name for the connector |
| Connector Type | Enter O365 Connector |
| Tenant Id | Tenant Id or Directory Id of the Azure AD subscription |
| Tenant Domain | Tenant domain for Office 365 (example.onmicrosoft.com) |
| Client Key | Application ID of the created client application |
| Secret Key | Secret key for the created application |
| Publisher Id | Id of the publisher for the created application. This is mainly used for webhooks. The value would be None in case of this implementation |
- Click Save after entering all the required details and click Test Connection, to test the configuration.
- A Connection successful message will be displayed on screen along with the time stamp.
- If the connection is not successful an error message will be displayed. Refer Troubleshooting Connector Validations for more details on the error message.
Once the connector is configured, validate if the connector is listed under Collection Status screen with status as Active. This signifies the connector is configured successfully and data is ready to ingest.
