- KNOWLEDGE BASE
- HUNTING WITH WORKBOOKS
- GETTING STARTED
-
START YOUR TRIAL
-
DEVICE INTEGRATION
-
CONNECTORS
-
DATA INGESTION
-
HUNTING WITH WORKBOOKS
-
DNIF Query Language (DQL Language)
-
SECURITY MONITORING
-
OPERATIONS
-
MANAGE DASHBOARDS
-
MANAGE REPORTS
-
USER MANAGEMENT & ACCESS CONTROL
-
BILLING
-
MANAGING YOUR COMPONENTS
-
GETTING STARTED
-
INSTALLATION
-
SOLUTION DESIGN
-
AUTOMATION
-
TROUBLESHOOTING AND DEBUGGING
-
LICENSE MANAGEMENT
-
RELEASE NOTES
-
API
-
POLICIES
-
SECURITY BULLETINS
-
BEST PRACTICES
-
DNIF AI
-
DNIF LEGAL AND SECURITY COMPLIANCE
How to create a Workbook?
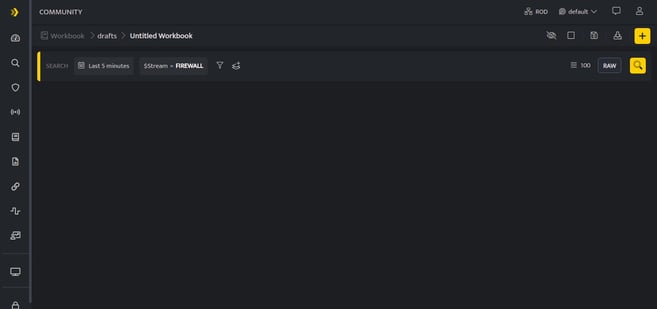
- Click the search icon on the left navigation bar or click the plus icon at the top right corner of the Workbooks list page to create a new workbook, the following screen is displayed.

-
To edit the workbook name click /drafts/ Untitled Workbook on the top left corner of the screen and enter a name of your preference.
- The first part of the Workbook name indicates the folder where the workbook will be saved. You can also create your own folder by clicking the plus sign at the end of the folder list.
-
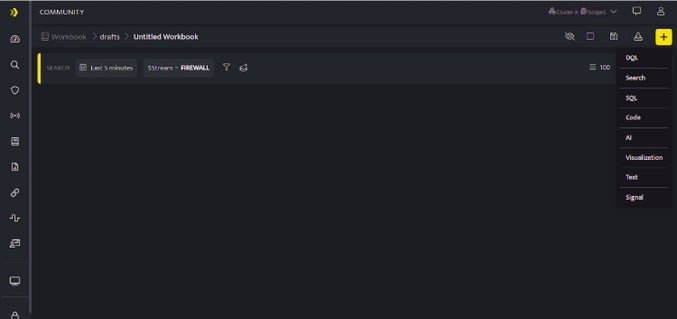
Click the plus icon on this page to add the required blocks to your Workbook.

-
The first Block to be added in a Workbook should always be a Search Block / DQL Block / SQL / Text Block.
-
Code, Signal, Visualization Blocks can be added only after adding a Search Block / DQL Block
-
All query results will be retained only for an hour.
- Once you have added all the required blocks in the Workbook. Click Save, to save your Workbook.
