Akamai connector is intended to read and ingest content from your NetStorage Account.
Prerequisites
- Netstorage Domain Name
- Netstorage Key Name
- Netstorage Key
- Netstorage CP Code
How to derive the prerequisites?
- In Akamai, in the left menu navigate to ORIGIN SERVICES > NetStorage.
- In the left menu, click Upload Accounts.
- Create an upload account if required, and enable the HTTP API authentication in access methods, this will give you the NetStorage Key.
- The NetStorage Hostname is xxx-nsu.akamaihd.net
- The NetStorage Key name is the id of the upload account.
- Each NetStorage storage group can have multiple upload directories, adding an upload directory will also add a CP Code (the upload directory name will be the NetStorage CP Code. )
https://techdocs.akamai.com/netstorage/docs/create-an-upload-account
https://techdocs.akamai.com/netstorage/docs/the-netstorage-usage-api-1
Configurations
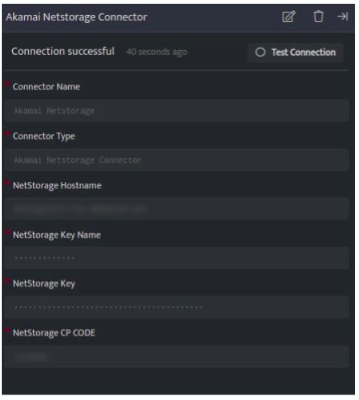
The following are the configurations to forward Akamai Netstorage Connector logs to DNIF.

| Field | Description |
| Connector Name | Enter a name for the connector |
| Connector Type | Enter Akamai Netstorage Connector |
| NetStorage Hostname | Enter your Netstorage Hostname |
| NetStorage Key Name | Enter your NetStorageKeyname (id of the upload account) |
| NetStorage Key | Enter your NetStorageKey you get while enabling HTTP API authentication |
| NetStorage CP Code | Enter your NetStorage CP Code (the upload directory name) |
- Click Save after entering all the required details and click Test Connection, to test the configuration.
- A Connection successful message will be displayed on screen along with the time stamp.
- If the connection is not successful an error message will be displayed. Refer Troubleshooting Connector Validations for more details on the error message.
Once the connector is configured, validate if the connector is listed under Collection Status screen with status as Active. This signifies the connector is configured successfully and data is ready to ingest.
